Configuring the SSH Server for SFTP and SCP access
This section of Getting Started assumes that:
- You have recently installed Bitvise SSH Server.
- You have installed Bitvise SSH Client on the same computer as the server to aid with initial setup.
- You have learned about how the SSH Server is used with Windows accounts and virtual accounts.
- You would like to configure the SSH Server to provide file transfer access via SFTP and SCP.
Protocols supported
The SSH Server supports file transfer protocols SFTP and SCP. Both of these run over SSH.
The SSH Server does not currently support plain FTP, or FTPS (FTP over TLS/SSL).
We plan to support FTPS in a future version.
Create a virtual account
First, open Easy SSH Server settings and create a virtual account:

For virtual accounts, default settings are already to:
- Allow file transfer.
- Do not allow shell access (or exec requests).
- Do not allow port forwarding.
The main settings to configure are the virtual account name, password, and the root directory for file transfers.
Prevent unrestricted terminal shell access
It is important that accounts which should have limited access to the server's filesystem are not granted a shell access type that provides Command Prompt, PowerShell, bash, or other open-ended terminal shell access.
Restricted users can be granted access to BvShell. This is the SSH Server's built-in shell, which respects the user's virtual filesystem configuration.
When a user is given access to a different shell (other than BvShell), those other shells are third-party applications that do not know about the SSH Server's virtual filesystem. They do not respect settings such as Limit to root directory.
Users who are configured with Shell access type set to No shell access will not be able to connect using a terminal SSH client, such as PuTTY. However, they will be able to connect with a file transfer client.
Start the SSH Server to create BvSsh_VirtualUsers
This example uses a virtual account with the default security context. The default security context is a Windows account named BvSsh_VirtualUsers which is created by the SSH Server. This account is not created until you:
- Create at last one virtual account.
- Start the SSH Server with at least one virtual account created.
Therefore, to make sure the BvSsh_VirtualUsers account exists, start the SSH Server and stop it.
If you experience issues finding the BvSsh_VirtualUsers account, check Q440 and Q460 in the SSH Server Usage FAQ.
Create a root directory for SFTP
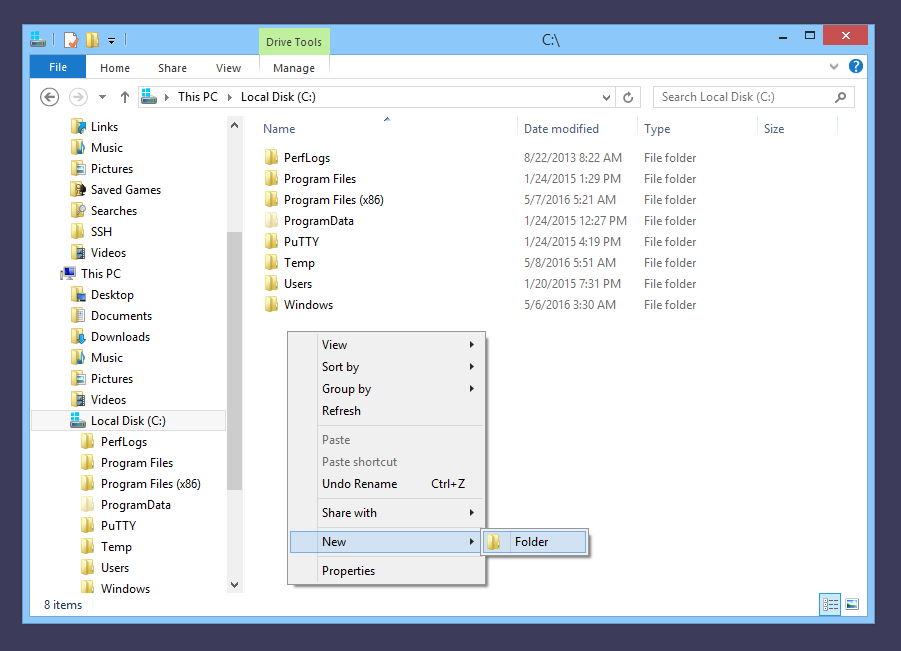
We will show a setup using virtual accounts, where the SSH client is not intended to have access to the server's entire filesystem. For this purpose, we need a directory which the SFTP or SCP client will be able to access. We will use Windows File Explorer to create the directory C:\SftpRoot:
Check Windows permissions
This example uses a virtual account with the default security context. We therefore need to ensure that the Windows account BvSsh_VirtualUsers can access files and subdirectories of the SFTP root directory we have created:
The Windows account BvSsh_VirtualUsers is a member of the Users group, but this group does not have Windows filesystem permissions to write to C:\SftpRoot. We will need to add permissions to allow virtual accounts to upload.
Configure Windows permissions
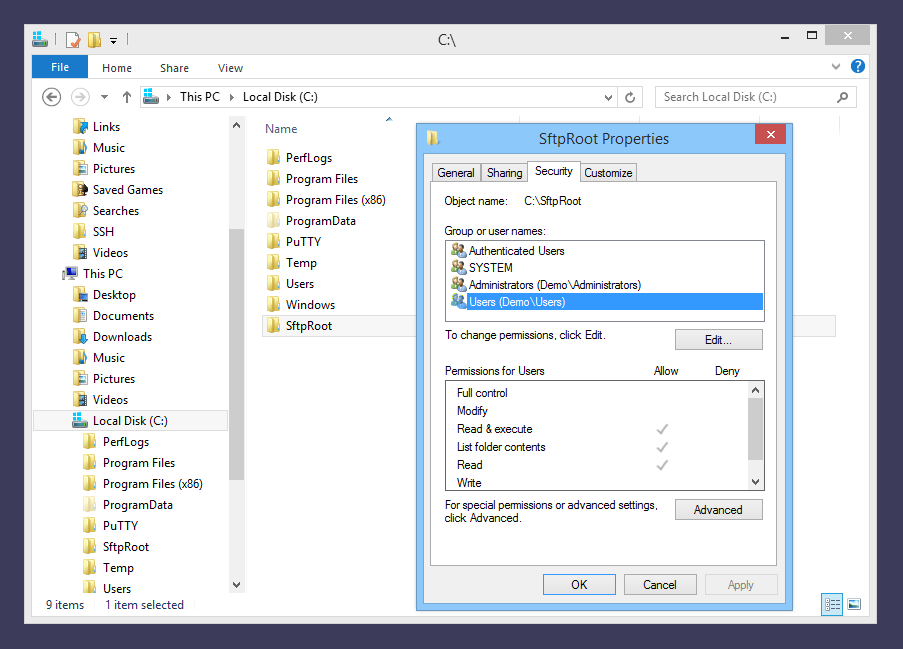
Still using Windows File Explorer, we will use Advanced Security Settings to grant Windows filesystem permissions to the contents of C:\SftpRoot to the BvSsh_VirtualUsers account:


This will allow virtual accounts to have full control over the files and subfolders in the C:\SftpRoot directory; but not over the parent directory itself.
It is possible to use this interface to grant more nuanced permissions also.
To control users' access to files and directories, you may use any combination of Windows filesystem permissions; mount point permissions configured in Advanced SSH Server settings; or both.
Connect using the virtual account
We will now use the SSH Client, which we have previously installed on the same computer, to verify the operation of our virtual account:
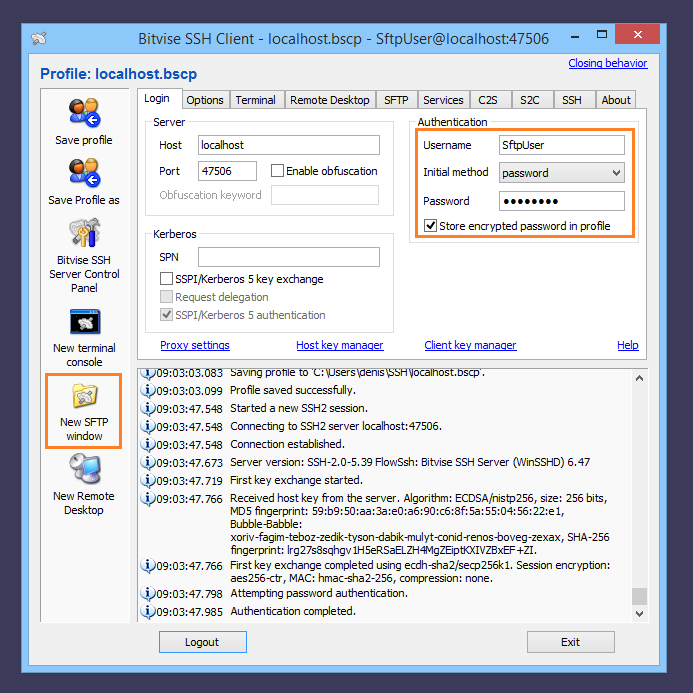
We use the same localhost SSH Client profile we created previously. We enter the new username and password and press Login. In this case, we have used the Options tab to disable automatic opening of the SFTP and terminal windows. Therefore, we click New SFTP window when the SSH Client connects.
If everything has gone well so far, the SFTP window opens.
Perform a test transfer
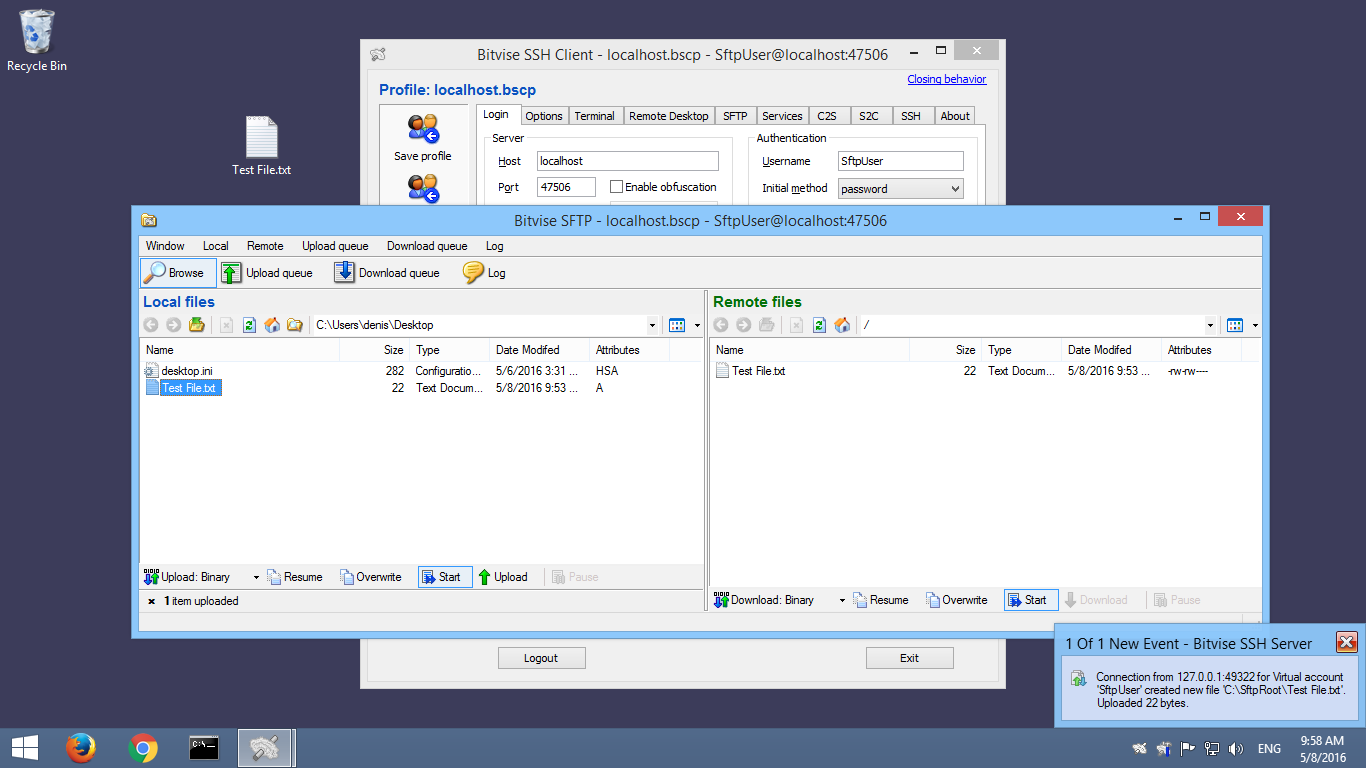
We have used Notepad to create a test file on the desktop, named "Test File.txt". We will upload this file to the server:

If we have configured Windows filesystem permissions correctly, the upload succeeds:
Verify limited access
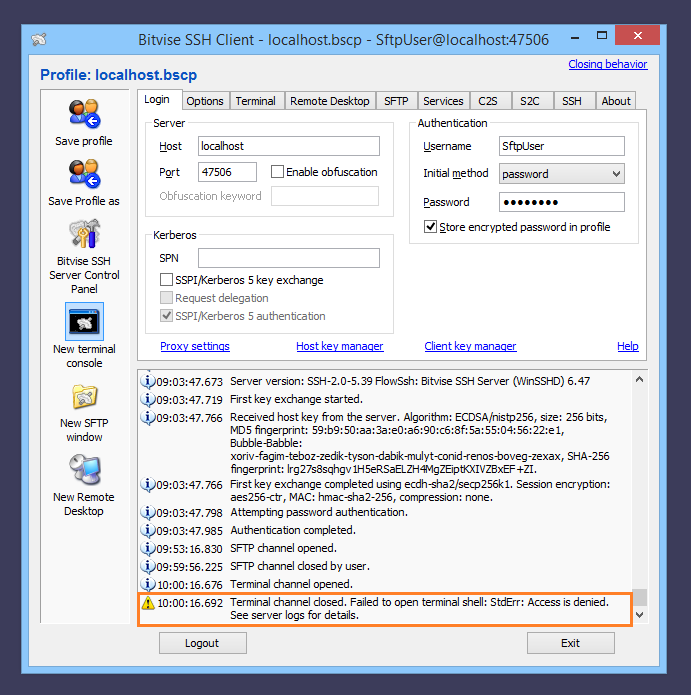
We have established that SFTP works. Now, make sure that the user cannot access the terminal shell:
We can also try to configure a server-to-client (S2C) port forwarding rule, to verify that the server does not permit it:

To perform the same check for client-to-server port forwarding (C2S), it is necessary not only to configure the rule, but also to try to connect.