When to install Bitvise SSH Server?
Install Bitvise SSH Server if:
You are operating a computer that's accessible from the internet:
- This can be a physical computer with a network connection on your property.
- It can be a physical computer hosted in a data center.
- It can be a virtual machine in a cloud service; including services like Amazon EC2, Rackspace, or Azure.
You want to allow yourself or other users to access this computer remotely for any of the following:
- SFTP or SCP file transfer, to or from this computer.
- Remote Desktop access, via SSH port forwarding, to this computer.
- Remote execution of tasks on this computer.
- Port forwarding of TCP connections via this computer.
The computer runs a desktop or server version of Windows:
- We target all x86 and x64 desktop and server editions of Windows that are in support by Microsoft.
- We additionally support Windows XP and Windows Server 2003.
For non-heavy use, hardware is not a concern. If the computer will run Windows, it will run the SSH Server.
Do not install Bitvise SSH Server if you do not have a computer that you want to access remotely, or to which you want to provide remote access.
- It does not make sense to install the SSH Server on a computer you're already using interactively - unless you want to access it remotely also.
- If you wish to use the SSH Server for a service it can provide; such as tunneling of web browsing traffic; you must first set up a remote computer on which to install it.
Download the SSH Server
To install the SSH Server, you first need to download it. We recommend always downloading the latest version of the SSH Server from our website, as follows:
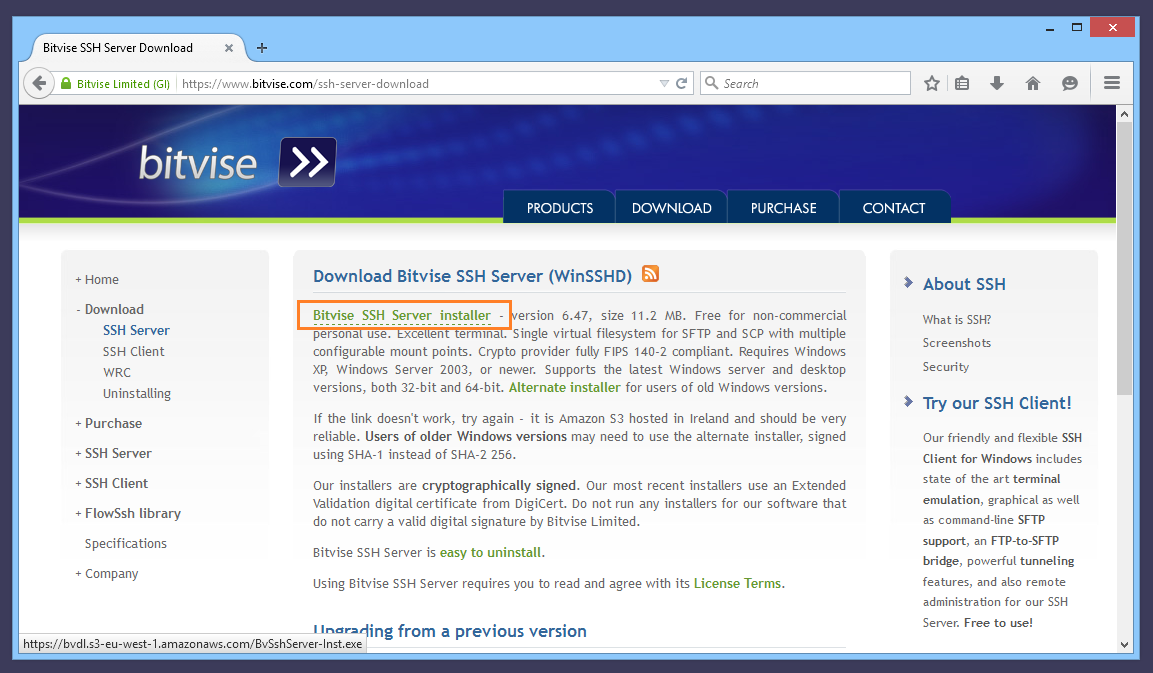
Open the SSH Server download page and download the installer.
Do not use older versions if you can avoid it. They may contain known security, compatibility, and reliability issues fixed in later versions.
For information about changes in SSH Server versions, consult the SSH Server version history.
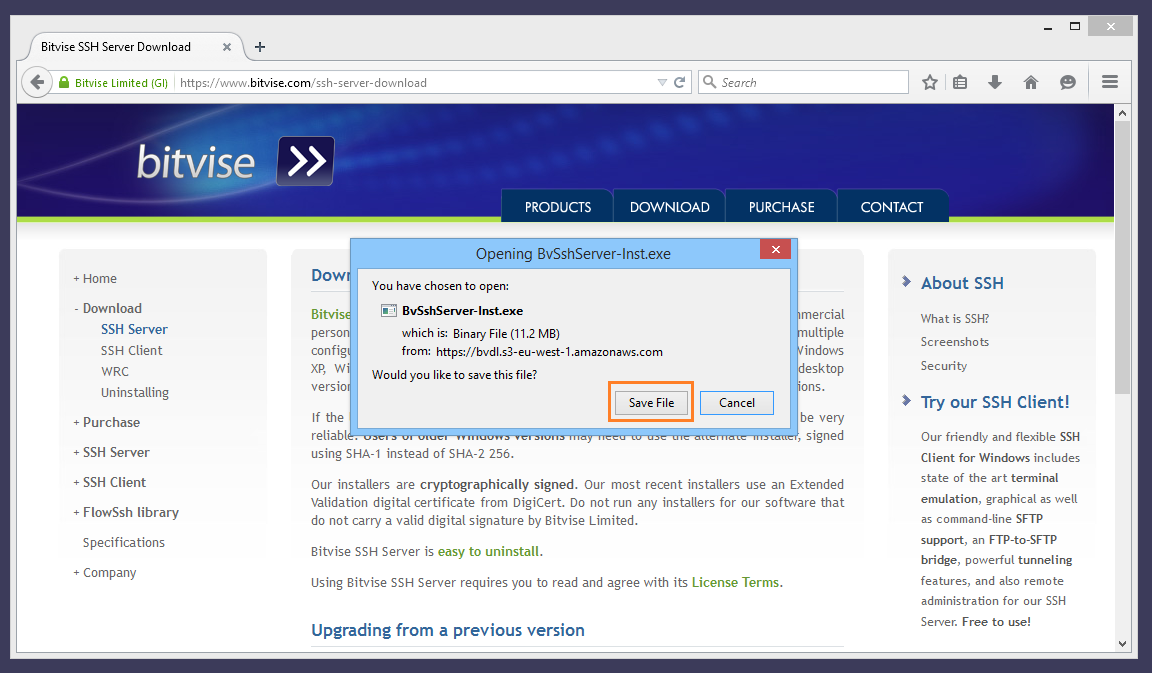
Choose to save the installer or run it, depending on what your browser offers.

If you're installing the SSH Server on the computer where you are downloading, run the installer when the download is done.
- You must run the installer using a Windows account that has administrative privileges.
- It is possible to install the SSH Server on a computer that's not connected to the internet. In this case, download the installer on a computer that's connected to the internet, and use a USB key to transfer it to another.
Run the installer


Windows will ask for authorization to run the installer with administrative permissions.
Check signature details to make sure you are running an original installer signed by Bitvise.
For higher security, we suggest checking the digital signature before starting the executable. Locate the executable using Windows File Explorer, right-click the executable, select Properties, and check the signatures on the Digital Signatures tab. If there is no Digital Signatures tab, the executable is not signed.
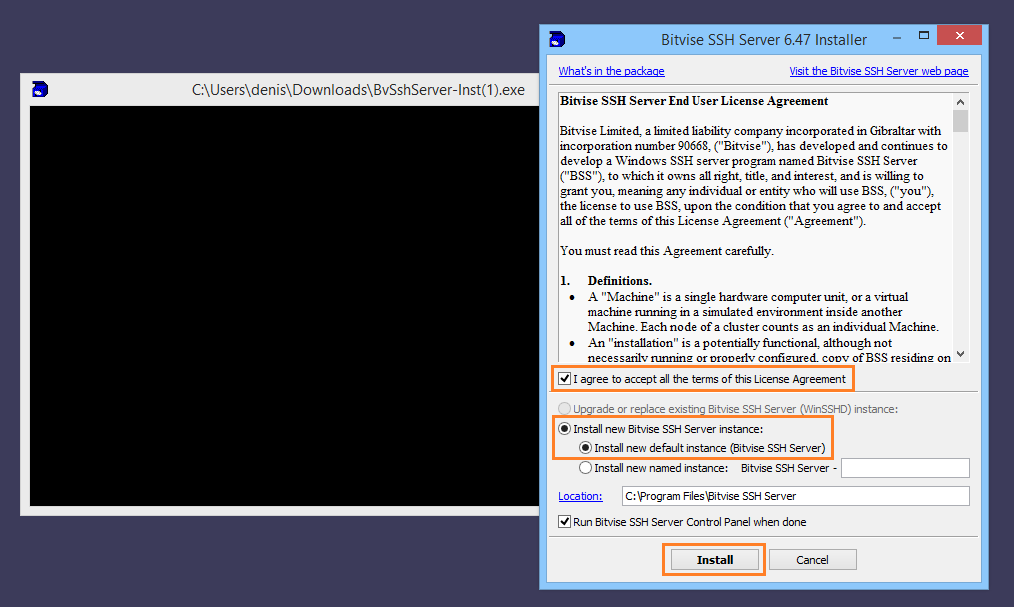
If you have approved to run the installer, the installer interface will appear.
- Review the End User License Agreement. You must accept the agreement to continue installation.
- No other action is required at this step.
- The black console window will show technical details of the installation, including information about any problems if they occur.
If you are not installing an additional instance - as described in Advanced installation, below - continue with the default setting: install a default instance.
Advanced installation
Advanced users may use the SSH Server installer to install multiple concurrent SSH Server instances. In this case, the instances will accept connections on separate ports, use separate settings, and need to be configured with separate names.
The SSH Server installer can also be run from the command line, to perform an installation unattended. Run the installer with suitable command line parameters in this case. For help with supported parameters, run the installer as follows:
BvSshServer-Inst -?
Choice of edition
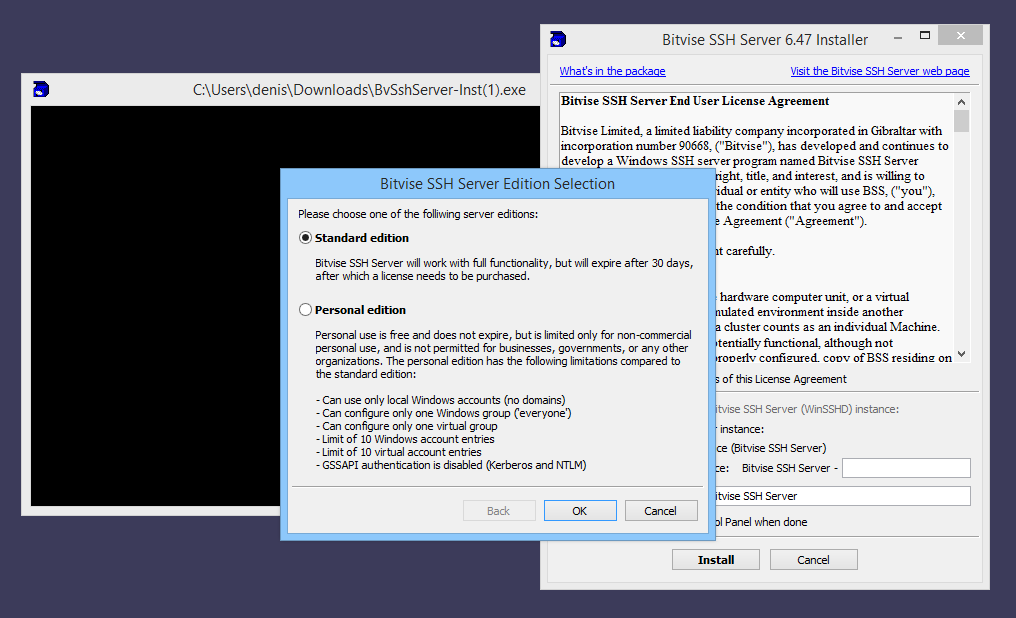
In a first-time installation on a computer that is not a domain controller, the SSH Server will prompt for the edition to use.
- If you are using the SSH Server in an organization, select the Standard Edition.
- If you are using the SSH Server commercially, select the Standard Edition.
- If you are using the SSH Server both personally and non-commercially, you may select the free Personal Edition.
- The Personal Edition has limitations. One is that it cannot be installed on a domain controller.
- If the computer is a domain controller, the Standard Edition will be installed.
Completing installation

After a first-time installation, the SSH Server will prompt for Windows to be restarted.
- Windows must be restarted to load a system component needed to create logon sessions for Windows accounts where no password is available. This is especially when using public key authentication.
- The SSH Server will run even if this component is not loaded, but password-less logon sessions will not work.
- If you cannot restart Windows, you can still use public key authentication with Windows accounts. In this case, use the "Manage password cache" interface in the SSH Server Control Panel, and enter the password for the Windows account into the SSH Server's password cache.
SSH Server Control Panel
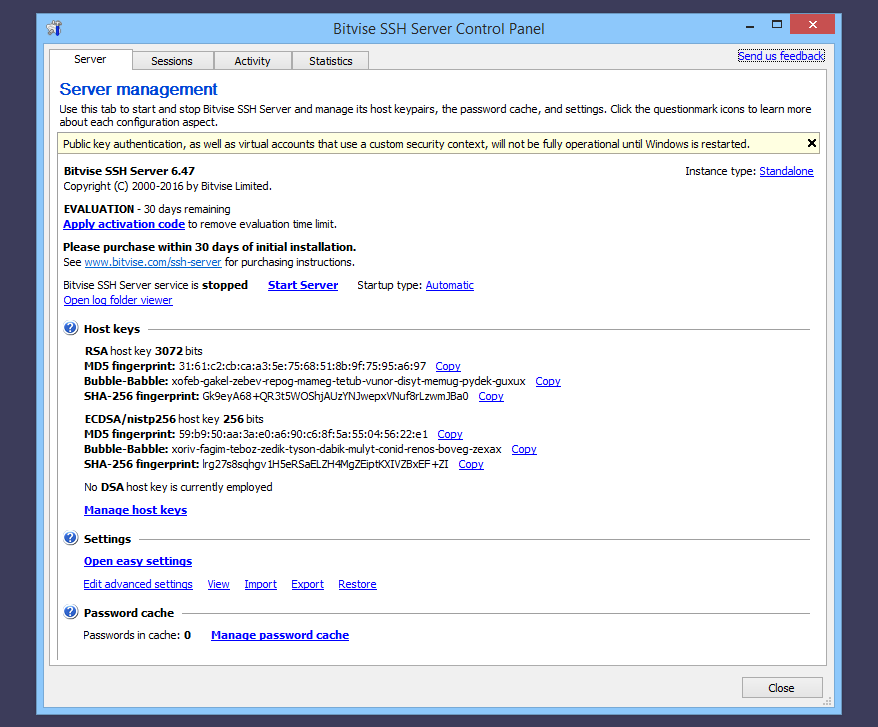
After the SSH Server is installed, the SSH Server Control Panel will open by default.
- A configuration wizard will open after installing for the first time. The wizard is identical to Easy settings, which you can access at any time.
- The SSH Server is not started at this point, but will start if you run it from the SSH Server Control Panel, or when the computer is restarted.
- Unless you configure it differently, the SSH Server will only accept connections from its local subnet (LAN) at this point.
- If the computer is using a Public network connection profile, the SSH Server will accept connections only from programs on the same computer at this point.

When you close the SSH Server Control Panel, it will continue to be available in the system notification area.
- The SSH Server Control Panel will display popup notifications about server activity.
- Displaying of popup notifications can be disabled by right-clicking on the notification area icon.
- The SSH Server Control Panel will start by default for any administrator that logs in.
- The automatic start and the persistent tray icon can be disabled by deselecting "Persistent Tray Icon" in the icon's right-click menu.
Advanced users can use the BssCfg command-line configuration utility to apply system-wide settings to prevent the SSH Server Control Panel from starting or showing popups by default.