Configuring public key authentication with Bitvise SSH Client
This section of Getting Started assumes that:
- You have recently installed Bitvise SSH Server.
- You have configured the SSH Server for access using SFTP, for Git access, or another purpose.
- You have installed Bitvise SSH Client on the computer from which you wish to connect.
- You wish to configure public key authentication between the SSH Server and Client.
Understanding public key authentication
Before you configure public key authentication, it is important to understand:
- Public keys, in the way they are commonly used in SSH, are not X.509 certificates.
- Client authentication keys are separate from server authentication keys (host keys).
- A keypair consists of a private key and a public key, which are separate.
- A private key should never be sent to another party. It is private.
If this is the first time you are using public keys, we recommend the page Public keys in SSH.
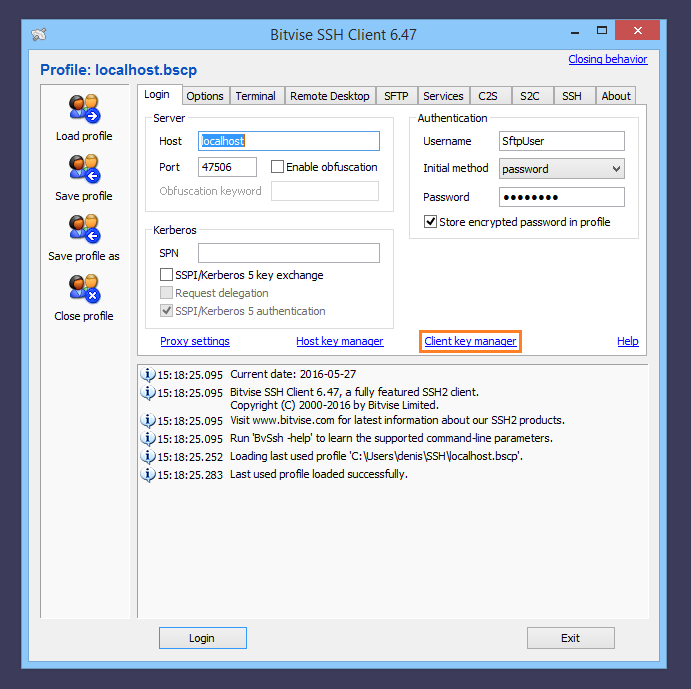
Generate public/private keypair
To use public key authentication, the client from which you are connecting needs to have a public/private keypair. To generate a keypair using Bitvise SSH Client, run the graphical SSH Client, and open the Client key manager:
Press the Generate button to generate a new keypair:
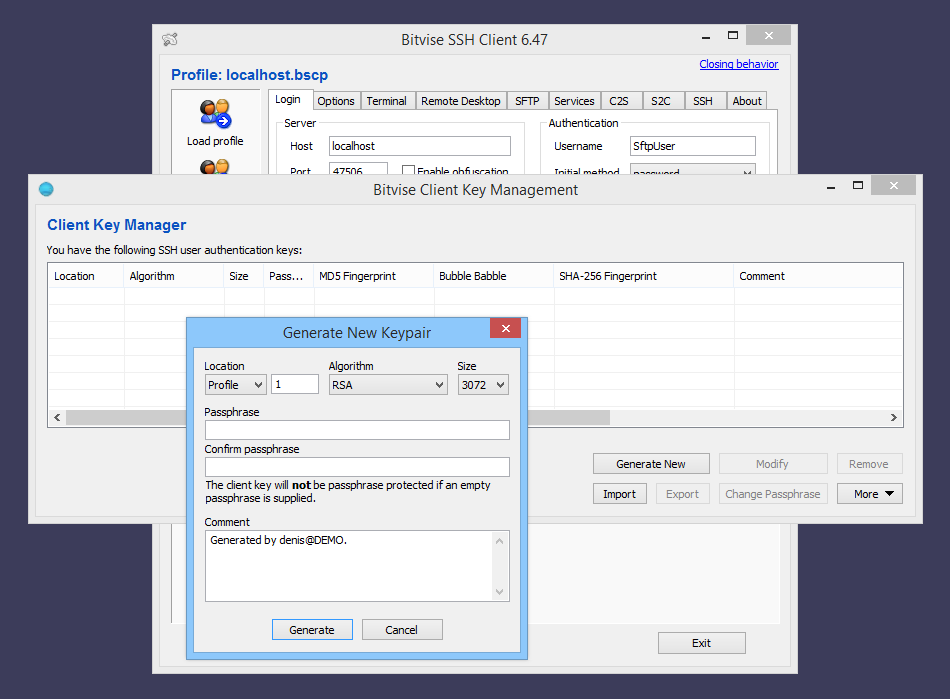
Guidelines:
Unless required for compatibility reasons, do not generate a DSA keypair. Only 1024-bit DSA keys are interoperable in SSH, and this key size is no longer considered adequate when using the DSA algorithm. Generate either an ECDSA keypair, or an RSA keypair of size 2048 bits or larger.
If you have saved a named SSH Client profile, the keypair generation interface will offer to store the keypair either in the profile, or globally.
When the keypair is stored globally, it is stored in the Windows registry for the current user, under HKCU\Software\Bitvise\Keypairs.
It may be useful to store the keypair in a profile if the profile is going to be used on other computers, or by a job that runs as a different Windows account on the same computer. In SSH Client versions 7.xx and higher, the setting Sensitive information accessibility on the Options tab controls whether a keypair stored in the profile can be read by another Windows user, or on another computer.
You can choose a passphrase with which to protect the keypair. If you enter a passphrase, you will need to provide it every time the keypair is used for authentication.
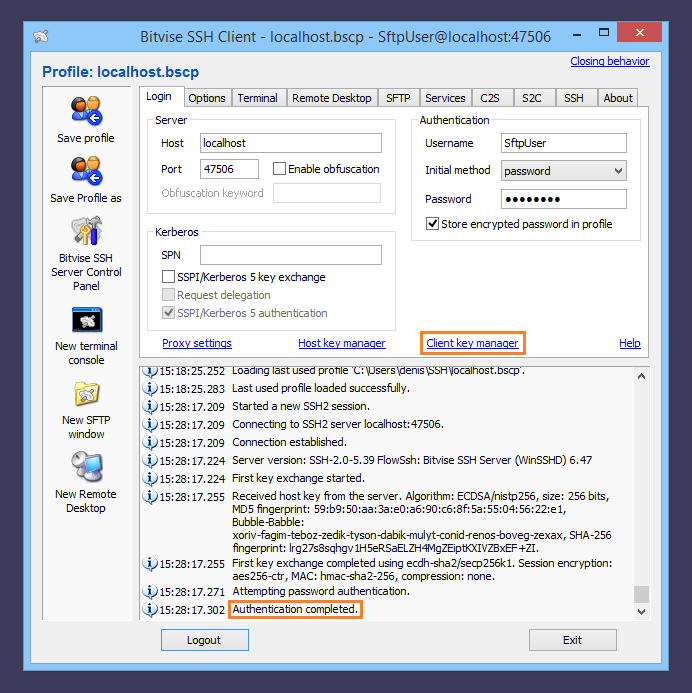
Upload public key to Bitvise SSH Server
Before you can use public key authentication, the public key for the keypair you have generated must be configured in the SSH Server. If you are able to connect to the SSH Server using password authentication, you can connect to the server and upload the public key using the Client key manager:
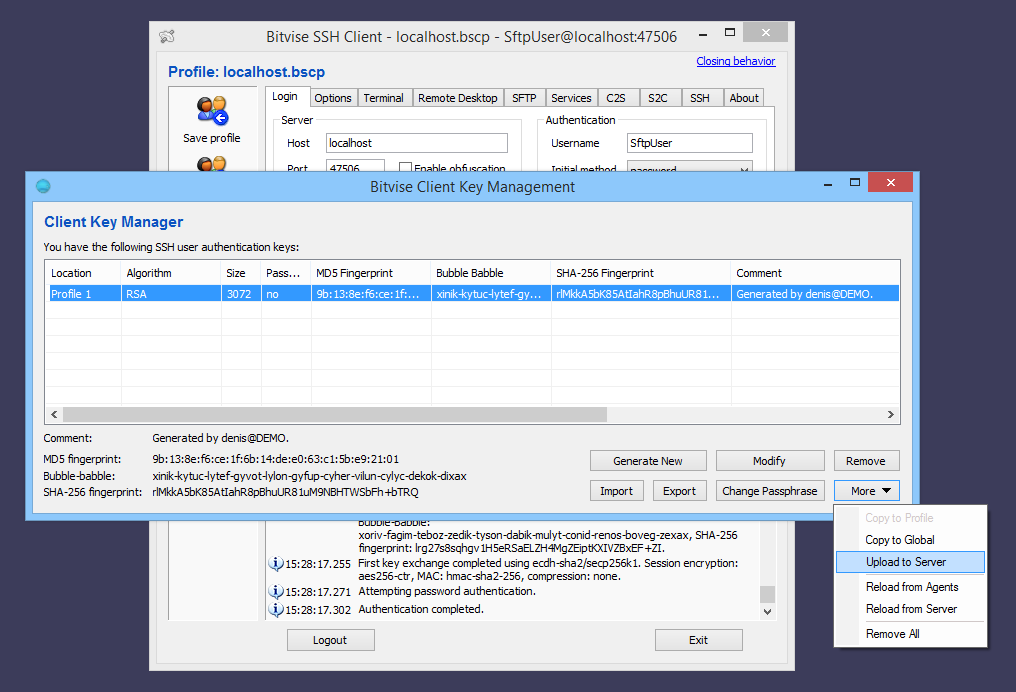
Alternative: Export public key
If the SSH Server does not allow you to connect using password authentication, or does not allow you to upload the key, you will need to send the public key to the server administrator using an alternate method of communication. To do this, export the public key using the Client key manager:

For help with importing the public key into Bitvise SSH Server, check the Public Key Authentication section of our SSH Server Usage FAQ.
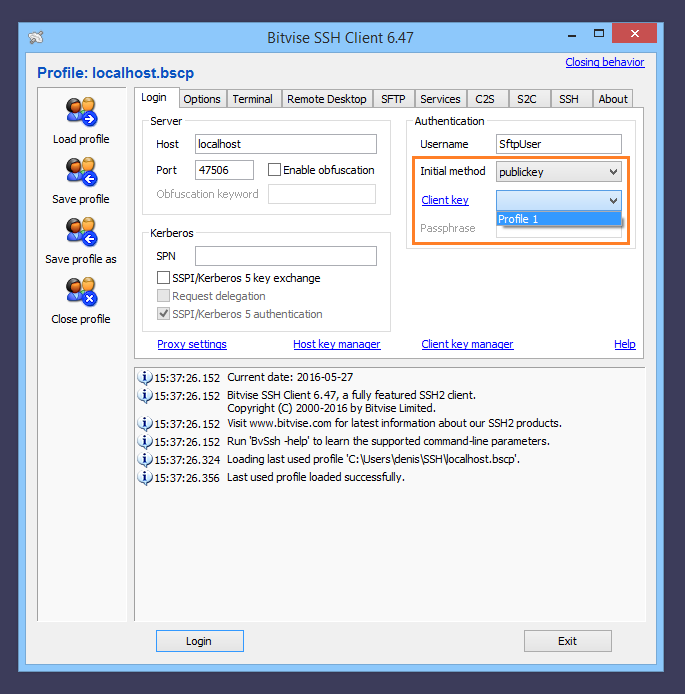
Configure public key authentication
Once the public key has been uploaded or imported for your account in the SSH Server, configure the SSH Client to enable public key authentication on the Login tab:
You should now be able to connect to the SSH Server using your public key:
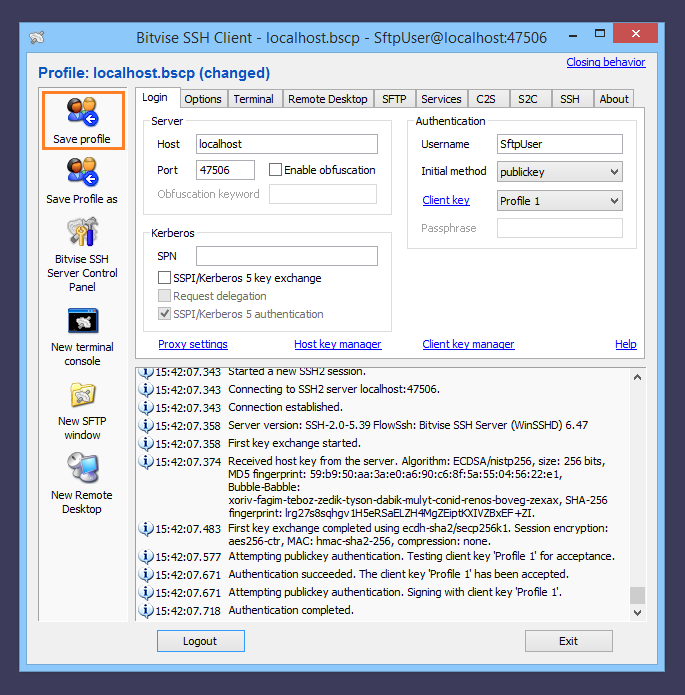
Save the profile to preserve this configuration.